Hardware Interrupts
In this post, we set up the programmable interrupt controller to correctly forward hardware interrupts to the CPU. To handle these interrupts, we add new entries to our interrupt descriptor table, just like we did for our exception handlers. We will learn how to get periodic timer interrupts and how to get input from the keyboard.
This blog is openly developed on GitHub. If you have any problems or questions, please open an issue there. You can also leave comments at the bottom. The complete source code for this post can be found in the post-07 branch.
Table of Contents
🔗Overview
Interrupts provide a way to notify the CPU from attached hardware devices. So instead of letting the kernel periodically check the keyboard for new characters (a process called polling), the keyboard can notify the kernel of each keypress. This is much more efficient because the kernel only needs to act when something happened. It also allows faster reaction times since the kernel can react immediately and not only at the next poll.
Connecting all hardware devices directly to the CPU is not possible. Instead, a separate interrupt controller aggregates the interrupts from all devices and then notifies the CPU:
                                    ____________             _____
               Timer ------------> |            |           |     |
               Keyboard ---------> | Interrupt  |---------> | CPU |
               Other Hardware ---> | Controller |           |_____|
               Etc. -------------> |____________|
Most interrupt controllers are programmable, which means they support different priority levels for interrupts. For example, this allows to give timer interrupts a higher priority than keyboard interrupts to ensure accurate timekeeping.
Unlike exceptions, hardware interrupts occur asynchronously. This means they are completely independent from the executed code and can occur at any time. Thus, we suddenly have a form of concurrency in our kernel with all the potential concurrency-related bugs. Rust’s strict ownership model helps us here because it forbids mutable global state. However, deadlocks are still possible, as we will see later in this post.
🔗The 8259 PIC
The Intel 8259 is a programmable interrupt controller (PIC) introduced in 1976. It has long been replaced by the newer APIC, but its interface is still supported on current systems for backwards compatibility reasons. The 8259 PIC is significantly easier to set up than the APIC, so we will use it to introduce ourselves to interrupts before we switch to the APIC in a later post.
The 8259 has eight interrupt lines and several lines for communicating with the CPU. The typical systems back then were equipped with two instances of the 8259 PIC, one primary and one secondary PIC, connected to one of the interrupt lines of the primary:
                     ____________                          ____________
Real Time Clock --> |            |   Timer -------------> |            |
ACPI -------------> |            |   Keyboard-----------> |            |      _____
Available --------> | Secondary  |----------------------> | Primary    |     |     |
Available --------> | Interrupt  |   Serial Port 2 -----> | Interrupt  |---> | CPU |
Mouse ------------> | Controller |   Serial Port 1 -----> | Controller |     |_____|
Co-Processor -----> |            |   Parallel Port 2/3 -> |            |
Primary ATA ------> |            |   Floppy disk -------> |            |
Secondary ATA ----> |____________|   Parallel Port 1----> |____________|
This graphic shows the typical assignment of interrupt lines. We see that most of the 15 lines have a fixed mapping, e.g., line 4 of the secondary PIC is assigned to the mouse.
Each controller can be configured through two I/O ports, one “command” port and one “data” port. For the primary controller, these ports are 0x20 (command) and 0x21 (data). For the secondary controller, they are 0xa0 (command) and 0xa1 (data). For more information on how the PICs can be configured, see the article on osdev.org.
🔗Implementation
The default configuration of the PICs is not usable because it sends interrupt vector numbers in the range of 0–15 to the CPU. These numbers are already occupied by CPU exceptions. For example, number 8 corresponds to a double fault. To fix this overlapping issue, we need to remap the PIC interrupts to different numbers. The actual range doesn’t matter as long as it does not overlap with the exceptions, but typically the range of 32–47 is chosen, because these are the first free numbers after the 32 exception slots.
The configuration happens by writing special values to the command and data ports of the PICs. Fortunately, there is already a crate called pic8259, so we don’t need to write the initialization sequence ourselves. However, if you are interested in how it works, check out its source code. It’s fairly small and well documented.
To add the crate as a dependency, we add the following to our project:
# in Cargo.toml

[dependencies]
pic8259 = "0.10.1"
The main abstraction provided by the crate is the ChainedPics struct that represents the primary/secondary PIC layout we saw above. It is designed to be used in the following way:
// in src/interrupts.rs

use pic8259::ChainedPics;
use spin;

pub const PIC_1_OFFSET: u8 = 32;
pub const PIC_2_OFFSET: u8 = PIC_1_OFFSET + 8;

pub static PICS: spin::Mutex<ChainedPics> =
    spin::Mutex::new(unsafe { ChainedPics::new(PIC_1_OFFSET, PIC_2_OFFSET) });
As noted above, we’re setting the offsets for the PICs to the range 32–47. By wrapping the ChainedPics struct in a Mutex, we can get safe mutable access (through the lock method), which we need in the next step. The ChainedPics::new function is unsafe because wrong offsets could cause undefined behavior.
We can now initialize the 8259 PIC in our init function:
// in src/lib.rs

pub fn init() {
    gdt::init();
    interrupts::init_idt();
    unsafe { interrupts::PICS.lock().initialize() }; // new
}
We use the initialize function to perform the PIC initialization. Like the ChainedPics::new function, this function is also unsafe because it can cause undefined behavior if the PIC is misconfigured.
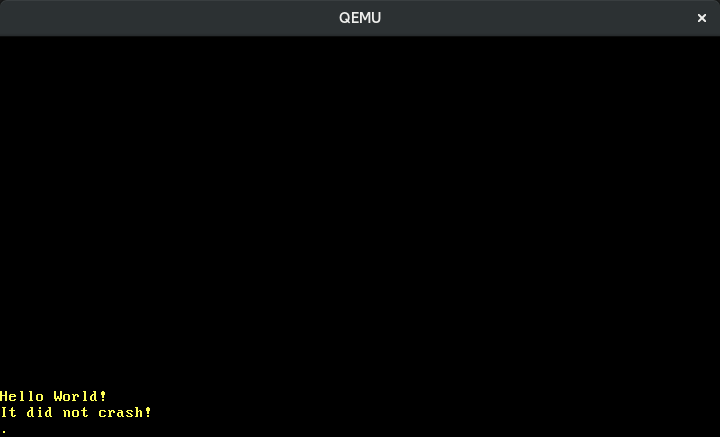
If all goes well, we should continue to see the “It did not crash” message when executing cargo run.
🔗Enabling Interrupts
Until now, nothing happened because interrupts are still disabled in the CPU configuration. This means that the CPU does not listen to the interrupt controller at all, so no interrupts can reach the CPU. Let’s change that:
// in src/lib.rs

pub fn init() {
    gdt::init();
    interrupts::init_idt();
    unsafe { interrupts::PICS.lock().initialize() };
    x86_64::instructions::interrupts::enable();     // new
}
The interrupts::enable function of the x86_64 crate executes the special sti instruction (“set interrupts”) to enable external interrupts. When we try cargo run now, we see that a double fault occurs:

The reason for this double fault is that the hardware timer (the Intel 8253, to be exact) is enabled by default, so we start receiving timer interrupts as soon as we enable interrupts. Since we didn’t define a handler function for it yet, our double fault handler is invoked.
🔗Handling Timer Interrupts
As we see from the graphic above, the timer uses line 0 of the primary PIC. This means that it arrives at the CPU as interrupt 32 (0 + offset 32). Instead of hardcoding index 32, we store it in an InterruptIndex enum:
// in src/interrupts.rs

#[derive(Debug, Clone, Copy)]
#[repr(u8)]
pub enum InterruptIndex {
    Timer = PIC_1_OFFSET,
}

impl InterruptIndex {
    fn as_u8(self) -> u8 {
        self as u8
    }

    fn as_usize(self) -> usize {
        usize::from(self.as_u8())
    }
}
The enum is a C-like enum so that we can directly specify the index for each variant. The repr(u8) attribute specifies that each variant is represented as a u8. We will add more variants for other interrupts in the future.
Now we can add a handler function for the timer interrupt:
// in src/interrupts.rs

use crate::print;

lazy_static! {
    static ref IDT: InterruptDescriptorTable = {
        let mut idt = InterruptDescriptorTable::new();
        idt.breakpoint.set_handler_fn(breakpoint_handler);
        […]
        idt[InterruptIndex::Timer.as_usize()]
            .set_handler_fn(timer_interrupt_handler); // new

        idt
    };
}

extern "x86-interrupt" fn timer_interrupt_handler(
    _stack_frame: InterruptStackFrame)
{
    print!(".");
}
Our timer_interrupt_handler has the same signature as our exception handlers, because the CPU reacts identically to exceptions and external interrupts (the only difference is that some exceptions push an error code). The InterruptDescriptorTable struct implements the IndexMut trait, so we can access individual entries through array indexing syntax.
In our timer interrupt handler, we print a dot to the screen. As the timer interrupt happens periodically, we would expect to see a dot appearing on each timer tick. However, when we run it, we see that only a single dot is printed:
🔗End of Interrupt
The reason is that the PIC expects an explicit “end of interrupt” (EOI) signal from our interrupt handler. This signal tells the controller that the interrupt was processed and that the system is ready to receive the next interrupt. So the PIC thinks we’re still busy processing the first timer interrupt and waits patiently for the EOI signal before sending the next one.
To send the EOI, we use our static PICS struct again:
// in src/interrupts.rs

extern "x86-interrupt" fn timer_interrupt_handler(
    _stack_frame: InterruptStackFrame)
{
    print!(".");

    unsafe {
        PICS.lock()
            .notify_end_of_interrupt(InterruptIndex::Timer.as_u8());
    }
}
The notify_end_of_interrupt figures out whether the primary or secondary PIC sent the interrupt and then uses the command and data ports to send an EOI signal to the respective controllers. If the secondary PIC sent the interrupt, both PICs need to be notified because the secondary PIC is connected to an input line of the primary PIC.
We need to be careful to use the correct interrupt vector number, otherwise we could accidentally delete an important unsent interrupt or cause our system to hang. This is the reason that the function is unsafe.
When we now execute cargo run we see dots periodically appearing on the screen:
🔗Configuring the Timer
The hardware timer that we use is called the Programmable Interval Timer, or PIT, for short. Like the name says, it is possible to configure the interval between two interrupts. We won’t go into details here because we will switch to the APIC timer soon, but the OSDev wiki has an extensive article about the configuring the PIT.
🔗Deadlocks
We now have a form of concurrency in our kernel: The timer interrupts occur asynchronously, so they can interrupt our _start function at any time. Fortunately, Rust’s ownership system prevents many types of concurrency-related bugs at compile time. One notable exception is deadlocks. Deadlocks occur if a thread tries to acquire a lock that will never become free. Thus, the thread hangs indefinitely.
We can already provoke a deadlock in our kernel. Remember, our println macro calls the vga_buffer::_print function, which locks a global WRITER using a spinlock:
// in src/vga_buffer.rs

[…]

#[doc(hidden)]
pub fn _print(args: fmt::Arguments) {
    use core::fmt::Write;
    WRITER.lock().write_fmt(args).unwrap();
}
It locks the WRITER, calls write_fmt on it, and implicitly unlocks it at the end of the function. Now imagine that an interrupt occurs while the WRITER is locked and the interrupt handler tries to print something too:
| Timestep | _start | interrupt_handler |
|---|---|---|
| 0 | calls println! | |
| 1 | print locks WRITER | |
| 2 | interrupt occurs, handler begins to run | |
| 3 | calls println! | |
| 4 | print tries to lock WRITER (already locked) | |
| 5 | print tries to lock WRITER (already locked) | |
| … | … | |
| never | unlock WRITER |
The WRITER is locked, so the interrupt handler waits until it becomes free. But this never happens, because the _start function only continues to run after the interrupt handler returns. Thus, the entire system hangs.
🔗Provoking a Deadlock
We can easily provoke such a deadlock in our kernel by printing something in the loop at the end of our _start function:
// in src/main.rs

#[unsafe(no_mangle)]
pub extern "C" fn _start() -> ! {
    […]
    loop {
        use blog_os::print;
        print!("-");        // new
    }
}
When we run it in QEMU, we get an output of the form:
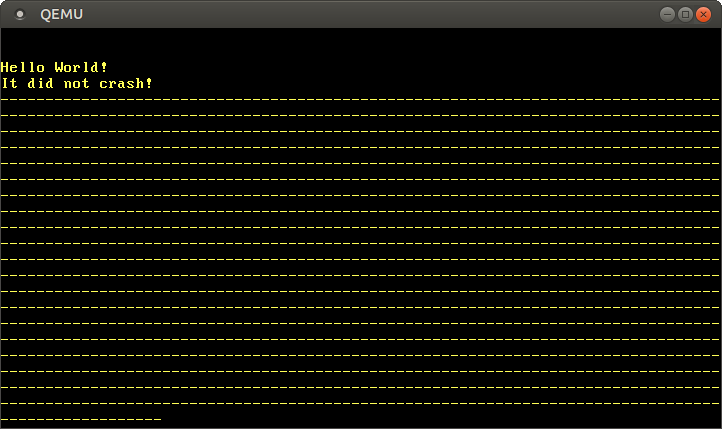
We see that only a limited number of hyphens are printed until the first timer interrupt occurs. Then the system hangs because the timer interrupt handler deadlocks when it tries to print a dot. This is the reason that we see no dots in the above output.
The actual number of hyphens varies between runs because the timer interrupt occurs asynchronously. This non-determinism is what makes concurrency-related bugs so difficult to debug.
🔗Fixing the Deadlock
To avoid this deadlock, we can disable interrupts as long as the Mutex is locked:
// in src/vga_buffer.rs

/// Prints the given formatted string to the VGA text buffer
/// through the global `WRITER` instance.
#[doc(hidden)]
pub fn _print(args: fmt::Arguments) {
    use core::fmt::Write;
    use x86_64::instructions::interrupts;   // new

    interrupts::without_interrupts(|| {     // new
        WRITER.lock().write_fmt(args).unwrap();
    });
}
The without_interrupts function takes a closure and executes it in an interrupt-free environment. We use it to ensure that no interrupt can occur as long as the Mutex is locked. When we run our kernel now, we see that it keeps running without hanging. (We still don’t notice any dots, but this is because they’re scrolling by too fast. Try to slow down the printing, e.g., by putting a for _ in 0..10000 {} inside the loop.)
We can apply the same change to our serial printing function to ensure that no deadlocks occur with it either:
// in src/serial.rs

#[doc(hidden)]
pub fn _print(args: ::core::fmt::Arguments) {
    use core::fmt::Write;
    use x86_64::instructions::interrupts;       // new

    interrupts::without_interrupts(|| {         // new
        SERIAL1
            .lock()
            .write_fmt(args)
            .expect("Printing to serial failed");
    });
}
Note that disabling interrupts shouldn’t be a general solution. The problem is that it increases the worst-case interrupt latency, i.e., the time until the system reacts to an interrupt. Therefore, interrupts should only be disabled for a very short time.
🔗Fixing a Race Condition
If you run cargo test, you might see the test_println_output test failing:
> cargo test --lib
[…]
Running 4 tests
test_breakpoint_exception...[ok]
test_println... [ok]
test_println_many... [ok]
test_println_output... [failed]

Error: panicked at 'assertion failed: `(left == right)`
  left: `'.'`,
 right: `'S'`', src/vga_buffer.rs:205:9
The reason is a race condition between the test and our timer handler. Remember, the test looks like this:
// in src/vga_buffer.rs

#[test_case]
fn test_println_output() {
    let s = "Some test string that fits on a single line";
    println!("{}", s);
    for (i, c) in s.chars().enumerate() {
        let screen_char = WRITER.lock().buffer.chars[BUFFER_HEIGHT - 2][i].read();
        assert_eq!(char::from(screen_char.ascii_character), c);
    }
}
The test prints a string to the VGA buffer and then checks the output by manually iterating over the buffer_chars array. The race condition occurs because the timer interrupt handler might run between the println and the reading of the screen characters. Note that this isn’t a dangerous data race, which Rust completely prevents at compile time. See the Rustonomicon for details.
To fix this, we need to keep the WRITER locked for the complete duration of the test, so that the timer handler can’t write a . to the screen in between. The fixed test looks like this:
// in src/vga_buffer.rs

#[test_case]
fn test_println_output() {
    use core::fmt::Write;
    use x86_64::instructions::interrupts;

    let s = "Some test string that fits on a single line";
    interrupts::without_interrupts(|| {
        let mut writer = WRITER.lock();
        writeln!(writer, "\n{}", s).expect("writeln failed");
        for (i, c) in s.chars().enumerate() {
            let screen_char = writer.buffer.chars[BUFFER_HEIGHT - 2][i].read();
            assert_eq!(char::from(screen_char.ascii_character), c);
        }
    });
}
We performed the following changes:
- We keep the writer locked for the complete test by using the
lock()method explicitly. Instead ofprintln, we use thewritelnmacro that allows printing to an already locked writer. - To avoid another deadlock, we disable interrupts for the test’s duration. Otherwise, the test might get interrupted while the writer is still locked.
- Since the timer interrupt handler can still run before the test, we print an additional newline
\nbefore printing the strings. This way, we avoid test failure when the timer handler has already printed some.characters to the current line.
With the above changes, cargo test now deterministically succeeds again.
This was a very harmless race condition that only caused a test failure. As you can imagine, other race conditions can be much more difficult to debug due to their non-deterministic nature. Luckily, Rust prevents us from data races, which are the most serious class of race conditions since they can cause all kinds of undefined behavior, including system crashes and silent memory corruptions.
🔗The hlt Instruction
Until now, we used a simple empty loop statement at the end of our _start and panic functions. This causes the CPU to spin endlessly, and thus works as expected. But it is also very inefficient, because the CPU continues to run at full speed even though there’s no work to do. You can see this problem in your task manager when you run your kernel: The QEMU process needs close to 100% CPU the whole time.
What we really want to do is to halt the CPU until the next interrupt arrives. This allows the CPU to enter a sleep state in which it consumes much less energy. The hlt instruction does exactly that. Let’s use this instruction to create an energy-efficient endless loop:
// in src/lib.rs

pub fn hlt_loop() -> ! {
    loop {
        x86_64::instructions::hlt();
    }
}
The instructions::hlt function is just a thin wrapper around the assembly instruction. It is safe because there’s no way it can compromise memory safety.
We can now use this hlt_loop instead of the endless loops in our _start and panic functions:
// in src/main.rs

#[unsafe(no_mangle)]
pub extern "C" fn _start() -> ! {
    […]

    println!("It did not crash!");
    blog_os::hlt_loop();            // new
}


#[cfg(not(test))]
#[panic_handler]
fn panic(info: &PanicInfo) -> ! {
    println!("{}", info);
    blog_os::hlt_loop();            // new
}
Let’s update our lib.rs as well:
// in src/lib.rs

/// Entry point for `cargo test`
#[cfg(test)]
#[unsafe(no_mangle)]
pub extern "C" fn _start() -> ! {
    init();
    test_main();
    hlt_loop();         // new
}

pub fn test_panic_handler(info: &PanicInfo) -> ! {
    serial_println!("[failed]\n");
    serial_println!("Error: {}\n", info);
    exit_qemu(QemuExitCode::Failed);
    hlt_loop();         // new
}
When we run our kernel now in QEMU, we see a much lower CPU usage.
🔗Keyboard Input
Now that we are able to handle interrupts from external devices, we are finally able to add support for keyboard input. This will allow us to interact with our kernel for the first time.
Like the hardware timer, the keyboard controller is already enabled by default. So when you press a key, the keyboard controller sends an interrupt to the PIC, which forwards it to the CPU. The CPU looks for a handler function in the IDT, but the corresponding entry is empty. Therefore, a double fault occurs.
So let’s add a handler function for the keyboard interrupt. It’s quite similar to how we defined the handler for the timer interrupt; it just uses a different interrupt number:
// in src/interrupts.rs

#[derive(Debug, Clone, Copy)]
#[repr(u8)]
pub enum InterruptIndex {
    Timer = PIC_1_OFFSET,
    Keyboard, // new
}

lazy_static! {
    static ref IDT: InterruptDescriptorTable = {
        let mut idt = InterruptDescriptorTable::new();
        idt.breakpoint.set_handler_fn(breakpoint_handler);
        […]
        // new
        idt[InterruptIndex::Keyboard.as_usize()]
            .set_handler_fn(keyboard_interrupt_handler);

        idt
    };
}

extern "x86-interrupt" fn keyboard_interrupt_handler(
    _stack_frame: InterruptStackFrame)
{
    print!("k");

    unsafe {
        PICS.lock()
            .notify_end_of_interrupt(InterruptIndex::Keyboard.as_u8());
    }
}
As we see from the graphic above, the keyboard uses line 1 of the primary PIC. This means that it arrives at the CPU as interrupt 33 (1 + offset 32). We add this index as a new Keyboard variant to the InterruptIndex enum. We don’t need to specify the value explicitly, since it defaults to the previous value plus one, which is also 33. In the interrupt handler, we print a k and send the end of interrupt signal to the interrupt controller.
We now see that a k appears on the screen when we press a key. However, this only works for the first key we press. Even if we continue to press keys, no more ks appear on the screen. This is because the keyboard controller won’t send another interrupt until we have read the so-called scancode of the pressed key.
🔗Reading the Scancodes
To find out which key was pressed, we need to query the keyboard controller. We do this by reading from the data port of the PS/2 controller, which is the I/O port with the number 0x60:
// in src/interrupts.rs

extern "x86-interrupt" fn keyboard_interrupt_handler(
    _stack_frame: InterruptStackFrame)
{
    use x86_64::instructions::port::Port;

    let mut port = Port::new(0x60);
    let scancode: u8 = unsafe { port.read() };
    print!("{}", scancode);

    unsafe {
        PICS.lock()
            .notify_end_of_interrupt(InterruptIndex::Keyboard.as_u8());
    }
}
We use the Port type of the x86_64 crate to read a byte from the keyboard’s data port. This byte is called the scancode and it represents the key press/release. We don’t do anything with the scancode yet, other than print it to the screen:
The above image shows me slowly typing “123”. We see that adjacent keys have adjacent scancodes and that pressing a key causes a different scancode than releasing it. But how do we translate the scancodes to the actual key actions exactly?
🔗Interpreting the Scancodes
There are three different standards for the mapping between scancodes and keys, the so-called scancode sets. All three go back to the keyboards of early IBM computers: the IBM XT, the IBM 3270 PC, and the IBM AT. Later computers fortunately did not continue the trend of defining new scancode sets, but rather emulated the existing sets and extended them. Today, most keyboards can be configured to emulate any of the three sets.
By default, PS/2 keyboards emulate scancode set 1 (“XT”). In this set, the lower 7 bits of a scancode byte define the key, and the most significant bit defines whether it’s a press (“0”) or a release (“1”). Keys that were not present on the original IBM XT keyboard, such as the enter key on the keypad, generate two scancodes in succession: a 0xe0 escape byte and then a byte representing the key. For a list of all set 1 scancodes and their corresponding keys, check out the OSDev Wiki.
To translate the scancodes to keys, we can use a match statement:
// in src/interrupts.rs

extern "x86-interrupt" fn keyboard_interrupt_handler(
    _stack_frame: InterruptStackFrame)
{
    use x86_64::instructions::port::Port;

    let mut port = Port::new(0x60);
    let scancode: u8 = unsafe { port.read() };

    // new
    let key = match scancode {
        0x02 => Some('1'),
        0x03 => Some('2'),
        0x04 => Some('3'),
        0x05 => Some('4'),
        0x06 => Some('5'),
        0x07 => Some('6'),
        0x08 => Some('7'),
        0x09 => Some('8'),
        0x0a => Some('9'),
        0x0b => Some('0'),
        _ => None,
    };
    if let Some(key) = key {
        print!("{}", key);
    }

    unsafe {
        PICS.lock()
            .notify_end_of_interrupt(InterruptIndex::Keyboard.as_u8());
    }
}
The above code translates keypresses of the number keys 0-9 and ignores all other keys. It uses a match statement to assign a character or None to each scancode. It then uses if let to destructure the optional key. By using the same variable name key in the pattern, we shadow the previous declaration, which is a common pattern for destructuring Option types in Rust.
Now we can write numbers:
Translating the other keys works in the same way. Fortunately, there is a crate named pc-keyboard for translating scancodes of scancode sets 1 and 2, so we don’t have to implement this ourselves. To use the crate, we add it to our Cargo.toml and import it in our lib.rs:
# in Cargo.toml

[dependencies]
pc-keyboard = "0.7.0"
Now we can use this crate to rewrite our keyboard_interrupt_handler:
// in/src/interrupts.rs

extern "x86-interrupt" fn keyboard_interrupt_handler(
    _stack_frame: InterruptStackFrame)
{
    use pc_keyboard::{layouts, DecodedKey, HandleControl, Keyboard, ScancodeSet1};
    use spin::Mutex;
    use x86_64::instructions::port::Port;

    lazy_static! {
        static ref KEYBOARD: Mutex<Keyboard<layouts::Us104Key, ScancodeSet1>> =
            Mutex::new(Keyboard::new(ScancodeSet1::new(),
                layouts::Us104Key, HandleControl::Ignore)
            );
    }

    let mut keyboard = KEYBOARD.lock();
    let mut port = Port::new(0x60);

    let scancode: u8 = unsafe { port.read() };
    if let Ok(Some(key_event)) = keyboard.add_byte(scancode) {
        if let Some(key) = keyboard.process_keyevent(key_event) {
            match key {
                DecodedKey::Unicode(character) => print!("{}", character),
                DecodedKey::RawKey(key) => print!("{:?}", key),
            }
        }
    }

    unsafe {
        PICS.lock()
            .notify_end_of_interrupt(InterruptIndex::Keyboard.as_u8());
    }
}
We use the lazy_static macro to create a static Keyboard object protected by a Mutex. We initialize the Keyboard with a US keyboard layout and the scancode set 1. The HandleControl parameter allows to map ctrl+[a-z] to the Unicode characters U+0001 through U+001A. We don’t want to do that, so we use the Ignore option to handle the ctrl like normal keys.
On each interrupt, we lock the Mutex, read the scancode from the keyboard controller, and pass it to the add_byte method, which translates the scancode into an Option<KeyEvent>. The KeyEvent contains the key which caused the event and whether it was a press or release event.
To interpret this key event, we pass it to the process_keyevent method, which translates the key event to a character, if possible. For example, it translates a press event of the A key to either a lowercase a character or an uppercase A character, depending on whether the shift key was pressed.
With this modified interrupt handler, we can now write text:
🔗Configuring the Keyboard
It’s possible to configure some aspects of a PS/2 keyboard, for example, which scancode set it should use. We won’t cover it here because this post is already long enough, but the OSDev Wiki has an overview of possible configuration commands.
🔗Summary
This post explained how to enable and handle external interrupts. We learned about the 8259 PIC and its primary/secondary layout, the remapping of the interrupt numbers, and the “end of interrupt” signal. We implemented handlers for the hardware timer and the keyboard and learned about the hlt instruction, which halts the CPU until the next interrupt.
Now we are able to interact with our kernel and have some fundamental building blocks for creating a small shell or simple games.
🔗What’s next?
Timer interrupts are essential for an operating system because they provide a way to periodically interrupt the running process and let the kernel regain control. The kernel can then switch to a different process and create the illusion of multiple processes running in parallel.
But before we can create processes or threads, we need a way to allocate memory for them. The next posts will explore memory management to provide this fundamental building block.
Comments
Do you have a problem, want to share feedback, or discuss further ideas? Feel free to leave a comment here! Please stick to English and follow Rust's code of conduct. This comment thread directly maps to a discussion on GitHub, so you can also comment there if you prefer.
Instead of authenticating the giscus application, you can also comment directly on GitHub.